| Important: This article requires you to use HTML code. |
We have tons of professionally designed templates available for our drag-and-drop email editor, but if you have your own email design, you can use your HTML to create an email in our Custom Code editor.
Guidelines for designing custom code emails
When creating your HTML, here are some things to keep in mind:
- Opens and link tracking are automatic. The email code includes a tracking pixel by default to track opens. If the [[trackingImage]] is deleted, opens won't be tracked!
- External style sheets aren’t supported.
- Styles can be added to the code at the top of the email and are automatically inlined when the email is sent, or you can use inline styles.
- iFrames and form code are supported, but are usually stripped out by the email client.
- Non-standard HTML tags generated by proprietary software, like Microsoft Publisher or FrontPage, won't display correctly in many browsers and email clients:
- <v:shape>
- <o:column>
- <b: Xl>
- ![endif]
- JavaScript will likely not display because most email clients disable it for security reasons.
- We discourage the use of image mapping (adding multiple links to a single image) for the following reasons:
- Using image mapping breaks our link-tracking functionality, so any clicks on these links won't show up in your Clicks report.
- Using image maps is an outdated practice, and many versions of Outlook and other email clients do not render them correctly.
- Image maps aren't mobile-responsive. Image mapping specifies the "clickable spot" in your email using exact coordinates, but the elements of your email can shift so that the email displays properly when viewed on a mobile device. As a result, the coordinates you mapped may not stay in the spot you intended.
Create and name your custom code email
- Click Marketing channels > Email.
- Click the + Create an email button.

- Place your cursor over the Build with HTML option and click Select. If you're using a touchscreen device, you can tap on it.

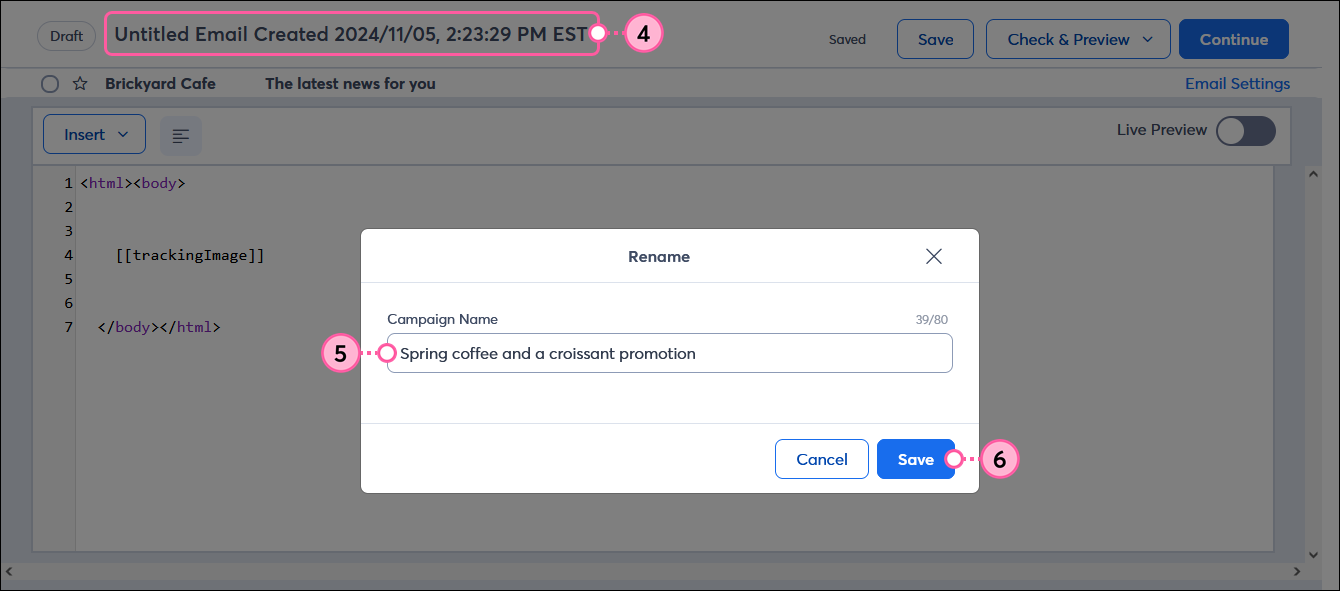
- Click anywhere on the email name to rename it.
- Enter a unique name that you can easily recognize in your account later. Your contacts won’t see this name—they only see your subject line.
- Click the Save button.
Customize your email header
 | Did you know? Per the CAN-SPAM Act of 2003, a footer including your physical address is always added to the bottom of your custom code email. You can change the physical address that appears in the footer when you schedule and send your email. |
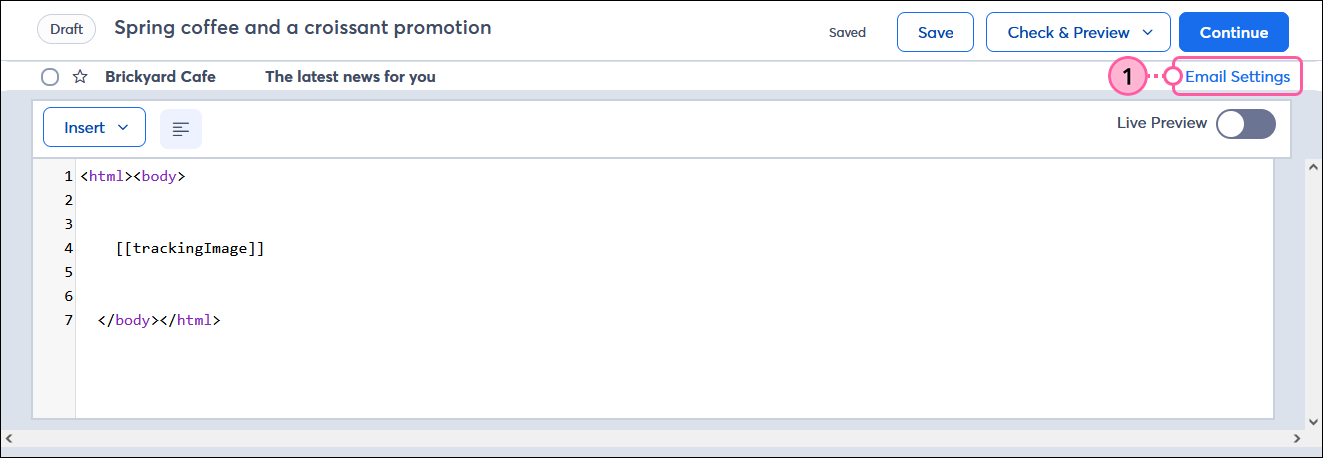
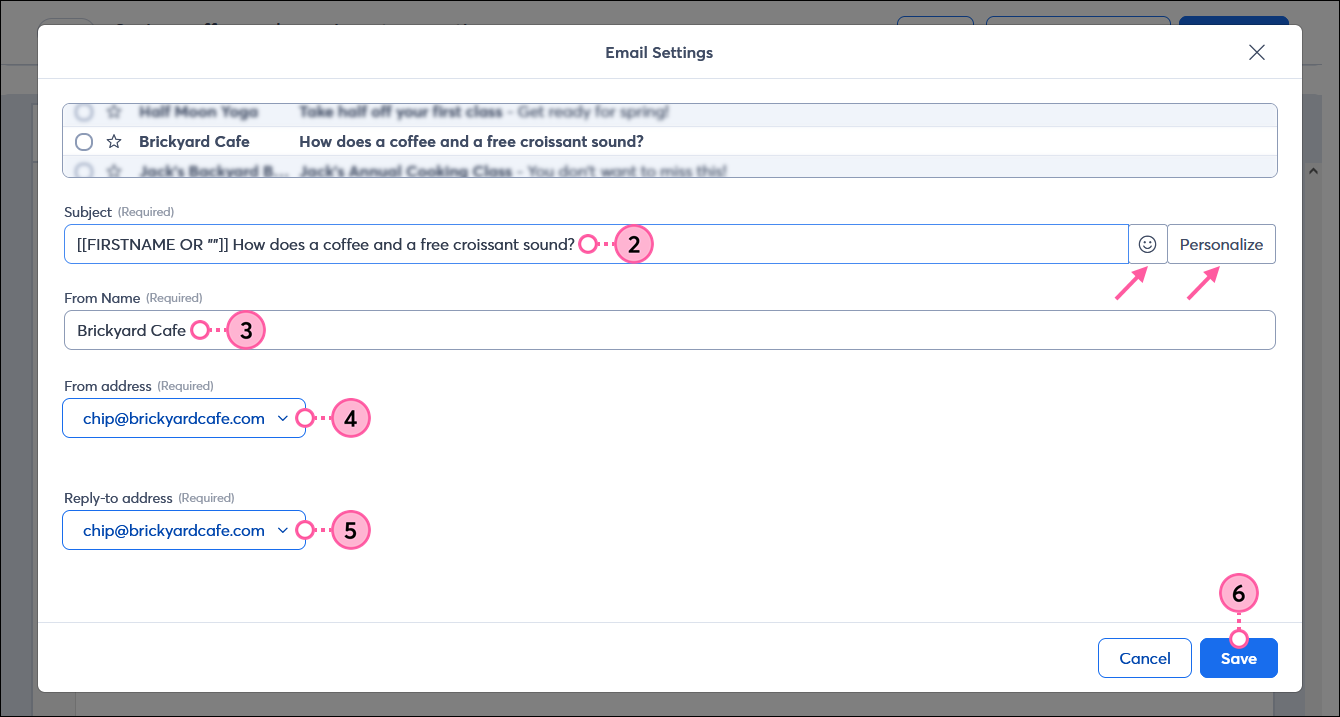
- Click Email settings to edit the email header.
- Update your subject line. You can add emoji and use subject line personalization to include contact details and custom fields too!
- Enter a From Name. Make sure to use a name that your contacts can easily recognize as coming from you!
- Select your From address from the drop-down menu.
- Select a Reply-to address from the drop-down menu.
Note: If you need to verify a new email address as the From or Reply-to address, select the "Add another email option" from either drop-down menu. Once the address is verified, it appears in the drop-down menu. - Click the Save button.
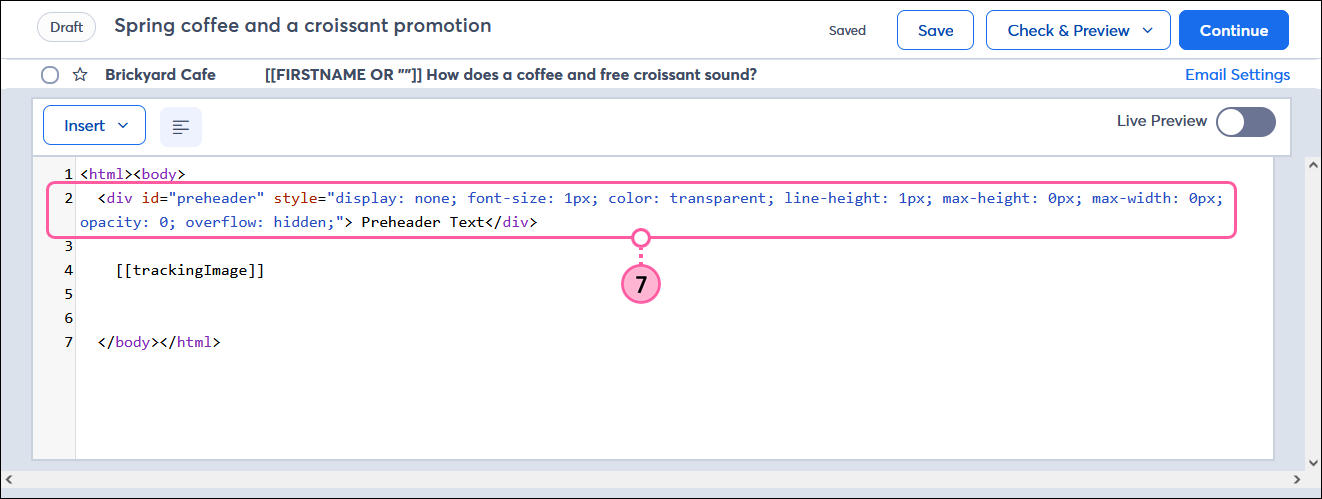
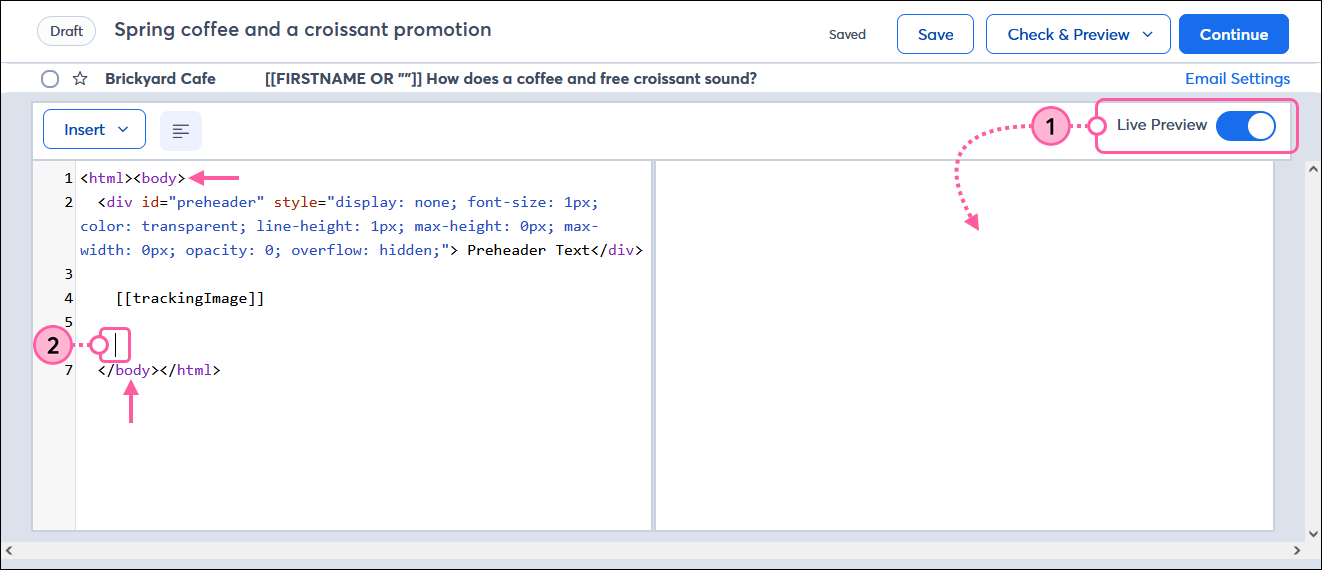
- (Optional) If you want to use a preheader with your subject line, add the following code after the <body> tag in your HTML, and update the "Preheader Text":
<div id="preheader" style="display: none; font-size: 1px; color: transparent; line-height: 1px; max-height: 0px; max-width: 0px; opacity: 0; overflow: hidden;"> Preheader Text</div>
Add code to your email
 | Design tip: To get the best results in the most email clients, design your code for an email, not for a webpage. |
- (Optional) Click the Live Preview toggle to see what your HTML code looks like as you write it. You can turn this on and off as you edit.
Note: When the preview is enabled, the code automatically wraps to fit in the reduced editor window. However, you can click the alignment button on the left-hand side of the editor to make it stretch across the full width of the editor. If the preview is enabled when your code is stretched, use the scroll bar at the bottom of the editor to view the full line of code. - Type or paste your HTML code between the <body> tags.
- Use the Insert drop-down menu to easily add one of the following elements wherever your cursor is located within the code:
- Add an image from your Library, including logos and animated GIFs.
- Add a video from your Vimeo account.
- Add contact details to personalize your content for each contact who receives your email.
- Include a Tracking Pixel tag if you accidentally delete the existing tag.
- Add a "View as Webpage" link so your contacts can view the full version of your email if their email client disables images.

| Did you know? Span id tags with the value of a social platform, such as Facebook or LinkedIn, convert the text into a link to allow recipients to share your email on their social media profiles. For example: <span id="Facebook"> Share on Facebook</span> |
Update the background image in your email
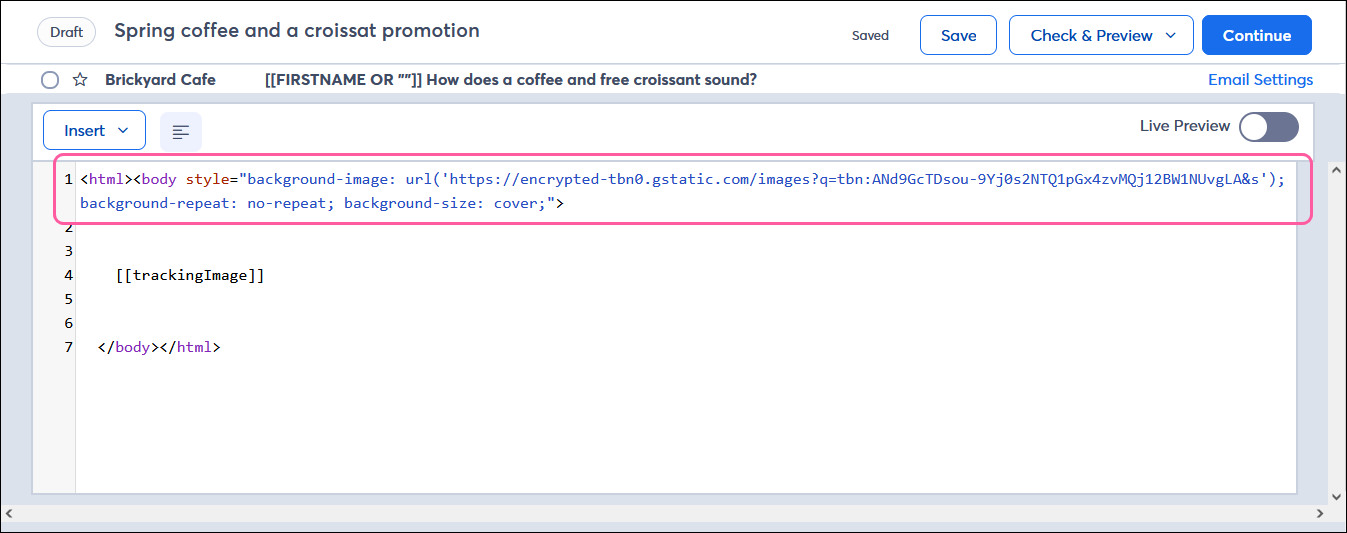
To update the background image in your HTML email template, you can add the following code to the <BODY> tag.
style="background-image: url('IMAGE-URL');"
Replace IMAGE-URL with the link to your image. By default, if the size of your image is smaller than your email, the image will repeat itself horizontally and vertically until it fills up the entire background of your email. To avoid this, save your image in a larger size or add the "background-repeat" property "no-repeat" to your HTML.
style="background-image: url('IMAGE-URL'); background-repeat: no-repeat;"
Now that your image will appear only once, you can ensure it enlarges to span the full width of your email with the "background-size" property, "cover."
style="background-image: url('IMAGE-URL'); background-repeat: no-repeat; background-size: cover;"
This is what the code looks like when added to the BODY element in your email.
The Live Preview may not show the background image, but you can see the image in the "Check & Preview" section. The image will not cover the footer of your email without additional code. For help with code and design, consider getting help from our professional services team.
 | Important: It's recommended that you use the preview tool before sending your email to your list(s) so that you can see exactly how your email will appear to your recipients. Sending test emails also helps you to see what the email will look like. |
Check your code for errors
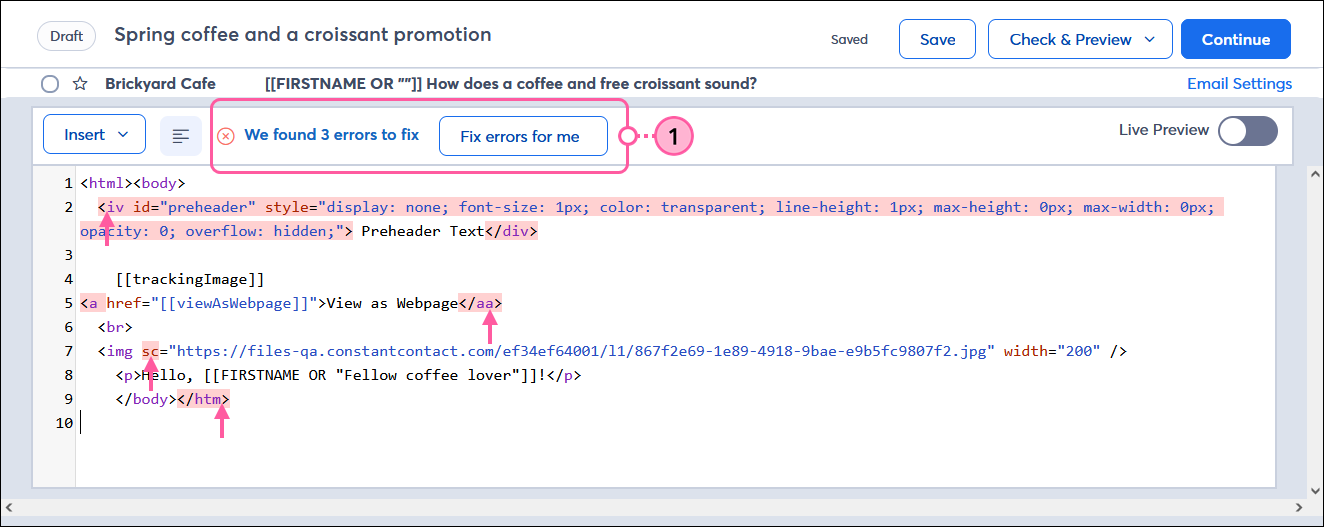
Our Custom Code editor automatically looks for errors in your code that could prevent your email from sending or from displaying the way you intended. As you work, there are visual indicators to notify you. Each error is highlighted in the code to draw your attention, or you can see a detailed list of errors and suggestions to correct them by clicking the error banner at the top of the email editor.
- Click the warning message to see detailed information about the issues found in your HTML code. You can correct the errors yourself, or depending on the error, you can click the Fix errors for me button. Code with errors is either updated or removed, so check your work carefully, as there is no "undo" option!
Note: If you don't see an error banner, you can click Check & Preview > Check for Errors to run the check manually.
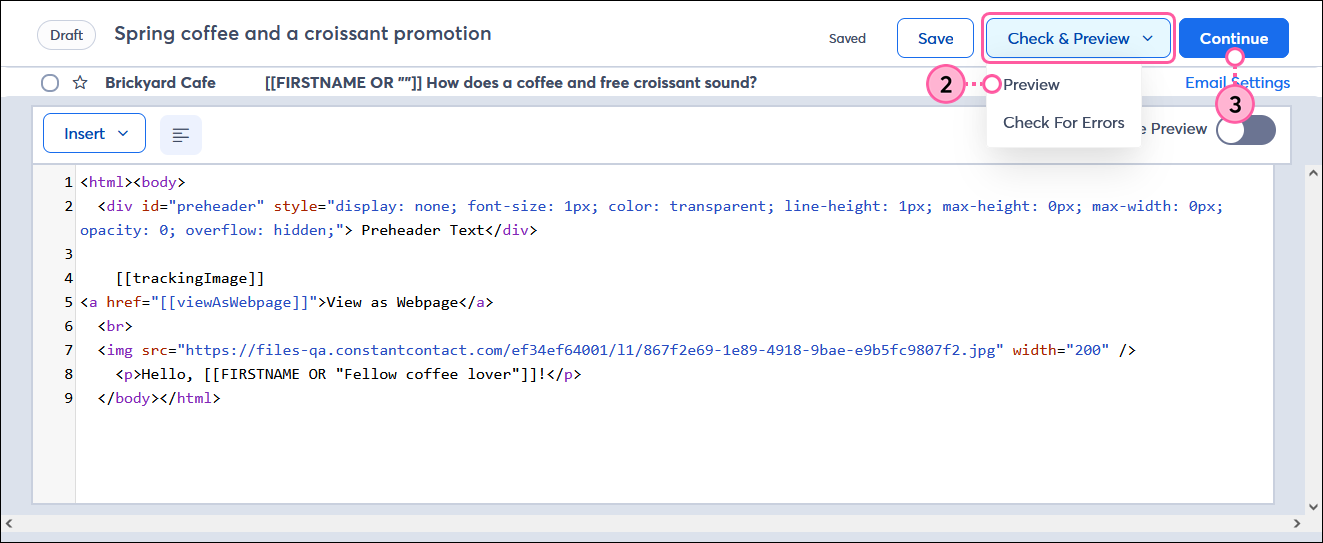
- (Optional) Click Check & Preview to see a preview of your email or to send a test version of your email to proofreaders.
- Once you’re ready to schedule and send your email to your contacts, click the Continue button.
Once the email is scheduled, you can share it on your social media pages to extend its reach. Give your contacts some time to open the email, and then check the results in your reporting to see how it performed.