Welcome to step three in your jounrey of getting started. TO see the prior steps please see.
Getting your contacts added to your Constant Contact account is just as important as designing and sending your emails. Whether you are moving over from a spreadsheet or digitizing a stack of business cards, this guide covers all the seamless ways you can build your email list.
1. Get to Your Contacts Dashboard
Before choosing a method, you need to navigate to your hub.
Click the Contacts dropdown at the top of your screen.
Click All contacts to enter your dashboard.
Click the Add contacts button to get started.
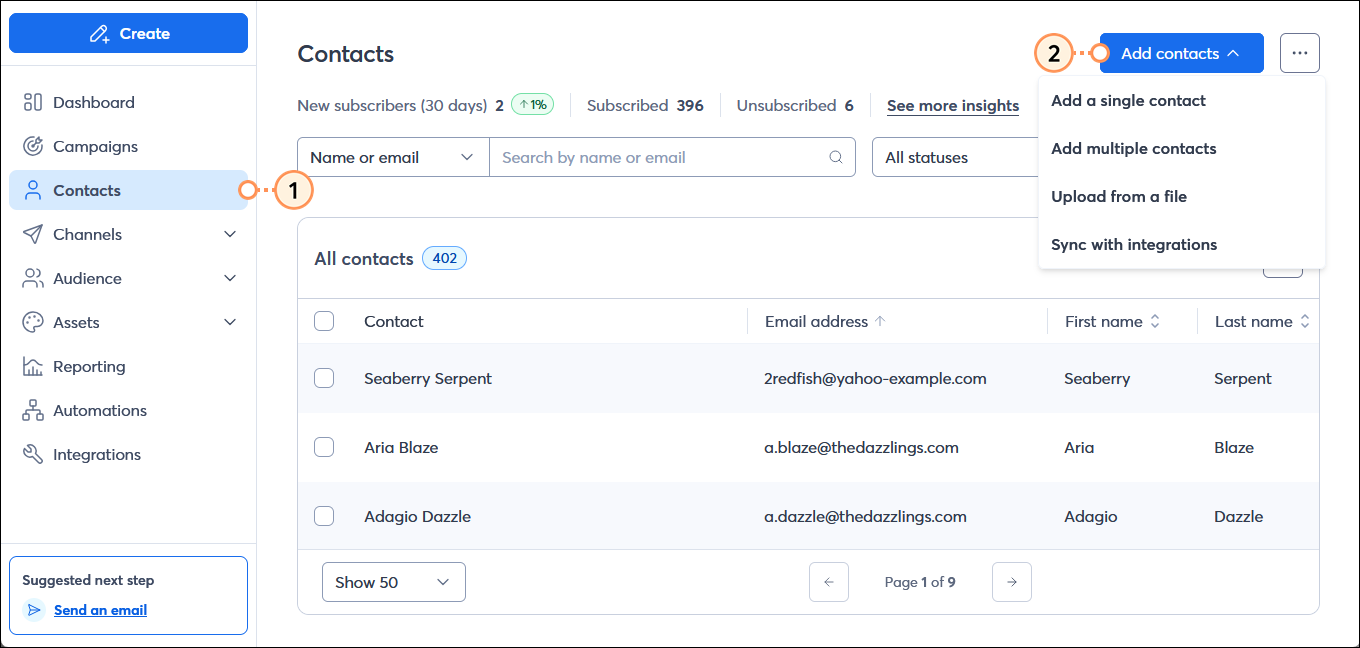
Important Note: To remain compliant with CAN-Spam, CASL, and GDPR regulations, you must have permission to send emails to the contacts you add.
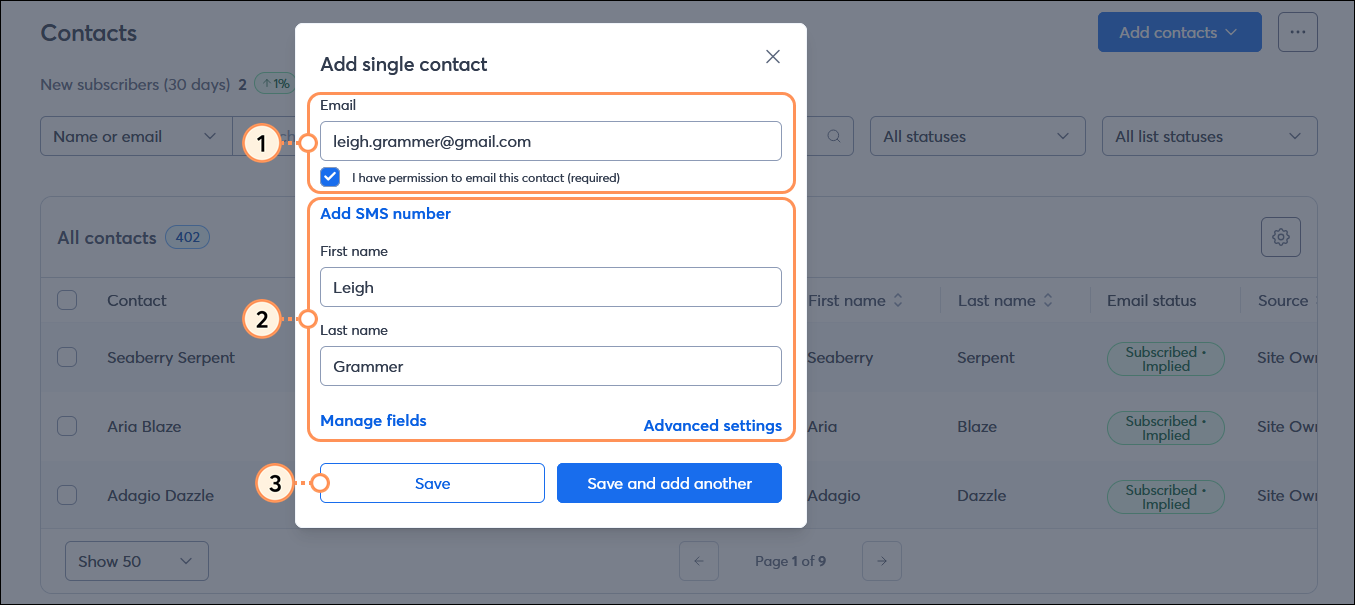
2. Add a Single Contact
If you only have one new subscriber to add, you can quickly enter their details manually.
Select Create a new contact.
Enter the contact's email address and click Continue.
Fill in their basic details (like First and Last Name) and select the specific lists you want to add them to.
Click Save to finalize.
3. Type or Paste Multiple Contacts
For a small handful of contacts, pasting them all at once is highly efficient.
Select Type or paste contacts.
You can type them in row by row, or click the Paste names and emails tab to paste a quick list.
If pasting, simply format it with their name and email, pressing Enter after each address.
Confirm your email permission, choose your lists, and click Import contacts.

Pro Tip: If you have more than 20 contacts, or collect extra information beyond just names and emails, it is highly recommended to use a spreadsheet and upload a file instead.
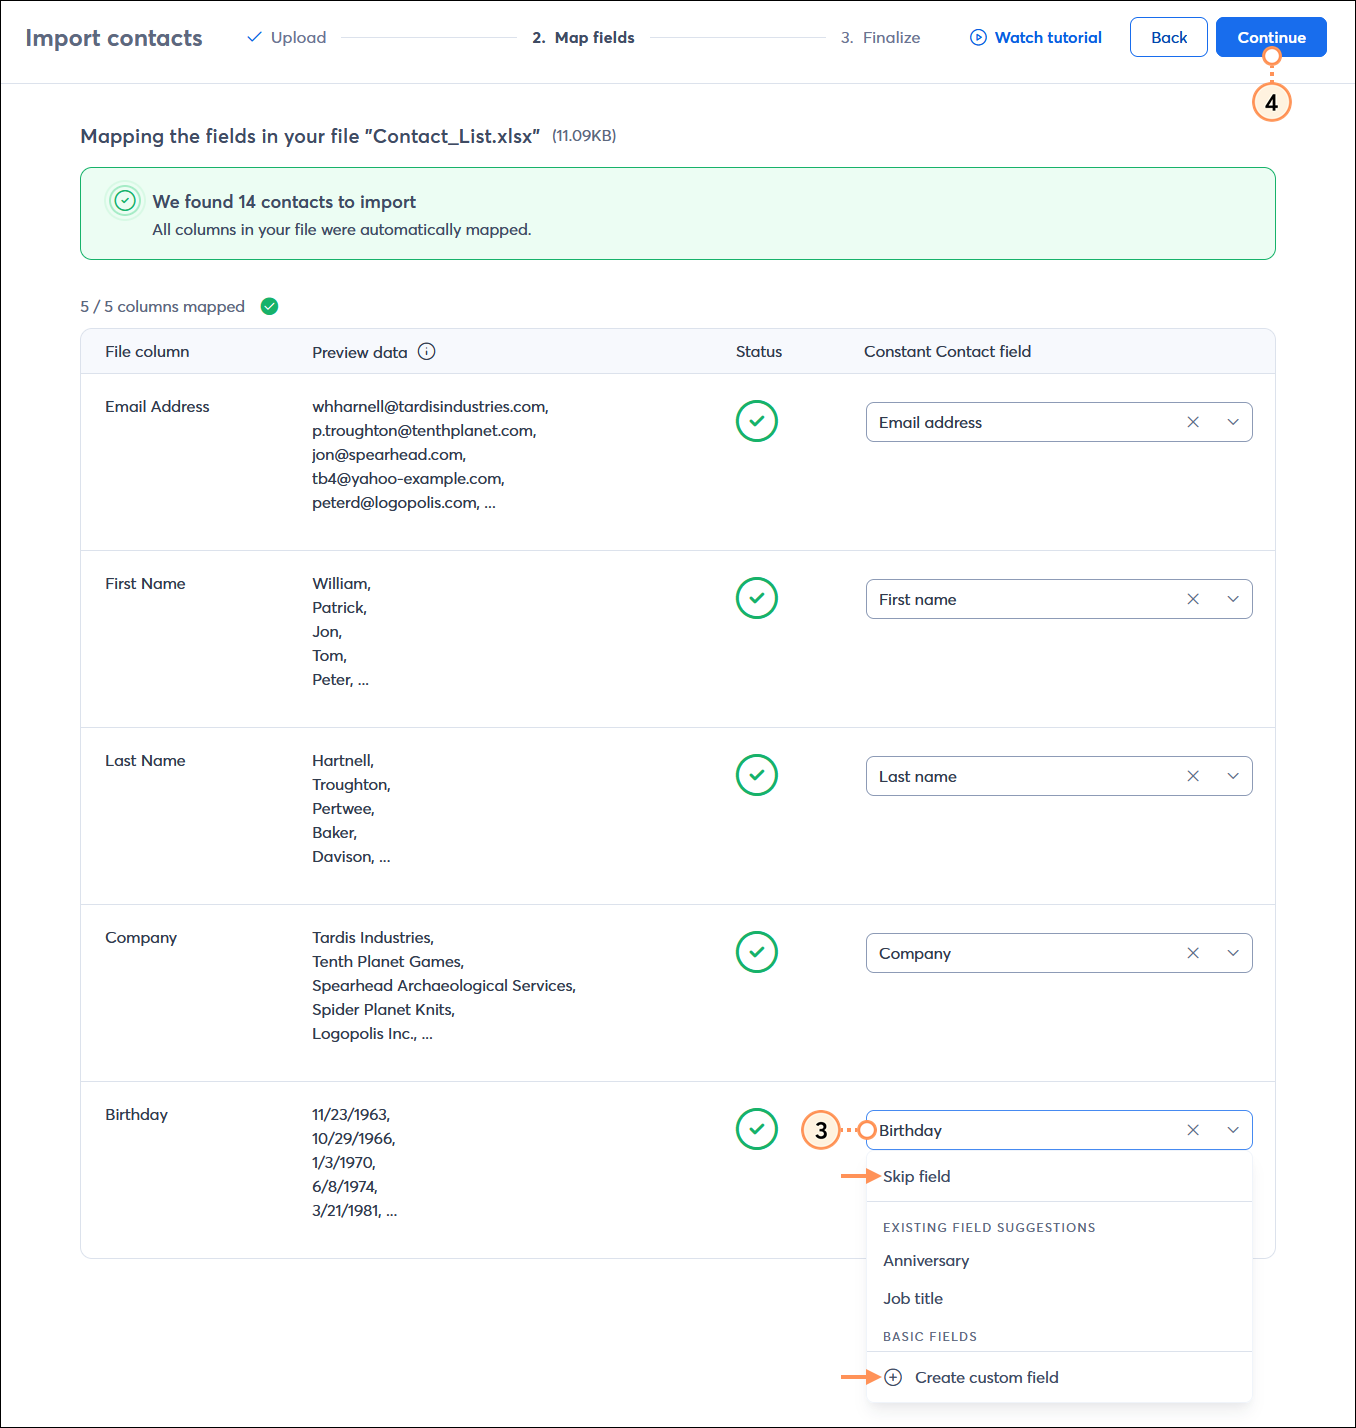
4. Upload Contacts From a File
If your contacts are stored in a .XLS, .XLSX, .CSV, .VCF, or plain text file, importing them is a breeze. You also don't need to worry about duplicates—Constant Contact automatically takes care of them for you!
Select Upload from file.
Drag and drop your file into the window, or browse your computer to select it.
Review your file columns and use the drop-downs to match the headers from your file (e.g., First Name, Last Name) to the field names in Constant Contact.
Confirm permission, select your lists, and click Import.

5. Import Contacts From Other Applications
If you’ve been collecting contacts in another program, CRM, or e-commerce client, you can sync your lists to keep them effortlessly up-to-date.
Navigate to Apps & integrations to discover connected apps.
You can connect seamlessly with tools like Wix, Squarespace, WooCommerce, BigCommerce, Mindbody, Zapier, and more.
Simply select your integration and follow the prompts to connect it to your account.